

Introduction
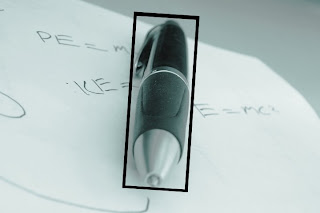
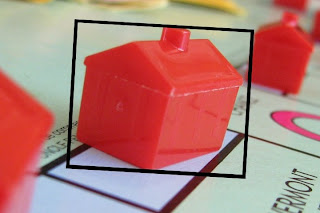
This idea is based on that many objects encompass a cube or sphere shape. i.e. A house will fit inside a stretched cube, and the same with a pen. A ball will fit inside a sphere. A cylinder shaped object will fit into an elongated cube. After doing more research (after posting this tutorial) I have discovered that using a basic shape like this is an overkill, but if you were to replace the can with something much more complex, it would really help.
The idea here is that you take a cube (stretched and squished to fit your needs) or sphere and use that to create a bounds of your object. You will then use the physics system to animate the sphere or cube, and then parent the object...lets say a trash can to the cube, which will give the trash can the animation properties of the cube.
This will make animations of multiple objects interacting, or hard to animate motions much easier to do.
Let's get into the tutorial part now.

Scene Setup
DOWNLOAD - Can
In this object I will be animating (or maybe I should say “simulating” a can falling onto the ground. To start out, you will need to make some kind of can or cylinder object. This is the can I made.

Now you need to add a cube to this scene. We will go into the bound view mode and stretch the cube out to fit around the bounds of the can. You may want to do this in perspective mode (Number Pad 5). We will call this cube Bounding Cube. 

Take the cube can, and place it around the can. Select both object and place them on top of the ramp.

You may want to parent the can to the Cube Bounds right now. I ended up doing it later on, but it would be a little easier to do it now. Now select the can and label, and move it to another layer (press “M”).
Download - Physics Setup

The Simulation
We will now set up the physics system.
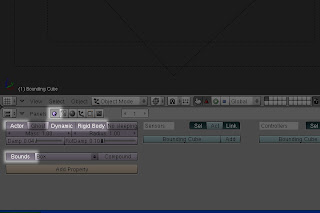
Select the cube bounds, go to the logic tab (F4), select the “actor” button, then “dynamic”, “rigid body”, and then the “bounds” button
Press “P” to start the game engine simulation to see what you have now.
Download - Physics Basic Setup
Download the video here. (3.19MB .mov)
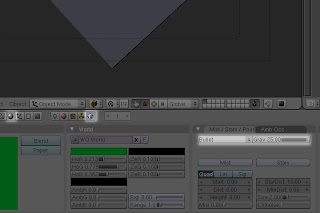
This is ok, but I want it to look more like a can falling and bouncing around on the ground with a lot of bounce and ground reaction. It also needs to go faster. I went in and adjusted the following setting.
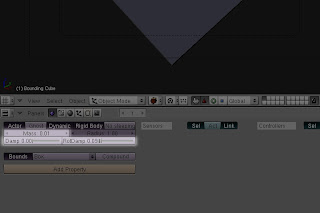
And also go to the world setting and adjusted the following.
And I had to move the bounds higher, and rotate the plane.

Finally, I extruded the edges of the plane so the cube would not fall off the edge.

Now for what we are waiting for. We are going to go to the game tab, and select “record game physics to IPO”.

Now press “P” and the animation will be recorded to your IPO Curves, and to the NLA editor. If you open up the NLA editor you can see all of the movement.

ALT+A will play back the animation in your 3D window, but at a much slower rate. One way to fix this is to scale the IPO curves down, but this crunches them together causing skipping. I don't have a “perfect fix” for this right now, aside from speeding up the animation in After Effects, Premiere, or any other editing program that can speed up video.
NOTE: I was notified by a Blender user that "The game engine records the simulation at 60fps. To record it at the same rate that is set in render settings, instead of pressing 'p', press "ctrl + alt + shift + p", the only problem is that the simulation will not always be the same way, i.e. object will fall through the ground plane and such. Instead, set the frame rate to 60fps, then in playback it will be the correct speed (you can also increase/decrease to your preference).
Now you need to show the layer that the can and label is in. You will have to move the can up to fit into the cube domain, since we earlier adjusted the domain higher than it was before (unless you already parented the can to the Domain Cube, then you will just have to show the layer the can is on). As a side note, you need to make sure that your can layer was not turned on when you recorded the simulation, otherwise your can will mess up the movement of the cube.

Parent the can to the cube domain. Now move the Cube Domain to another layer, and turn that layer off. You can also move the ramp to the same layer of the Cube Domain. Now render it out and see the results!
View video here. (3.24MB .mov)Download - Final Physics Setup
Here is the can physics after I sped it up in Adobe Premiere.
Click here to view the video (1.79MB .mov)
And here is the animation with some shading adjustments, along with a better camera view and animation. It was also sped up.
Click here to view the video. (1.79MB .mov)
You can see there is going to be a problem with items not being on the floor...that is another thing that would have to be worked out. Maybe the images could be composited into the scene separately. You can also get into the NLA editor and adjust the animation your self, but if you have too many objects in the scene it can be hard.
From the top view it looks fine though.
All Downloads
http://blendermodels.org/private/the_can.blend
http://blendermodels.org/private/physics_setup.blend
http://blendermodels.org/private/basic_setup_physics.blend
http://blendermodels.org/private/physics_2.blend
http://blendermodels.org/private/physics_3.blend
http://blendermodels.org/private/final_can_animation.blend
Final Thoughts
I hope this tutorial has been an immense help to you in creating animations like this.
Here are some other animations using the same technique.


7 comments:
The game engine records the simulation at 60fps. To record it at the same rate that is set in render settings, instead of pressing 'p', press "ctrl + alt + shift + p"
Thanks for that nice tutorial!
Keep it up!
Please, make a video tutorial.
I cannot seem to download the .blend files. Get "page not found" error msg.
I cannot seem to download the .blend files. Get "page not found" error msg.
Nice tutorial, Jeremiah. I like it :)
Don't be discouraged by those vitriolic snobs at Blendernation!
PS. What happened with the .blend files? Where are they?
That's cool Jeremiah. I tried a similar thing a few versions back when they first came out with the rigid body stuff, and I couldn't get it to work... glad you figured it out!
It seems like the can doesn't roll at all. Does it roll? If not could you animate the rolling by hand and still keep all the other movement?
I haven't opened blender in so long, but I might pick it back up if more of this type of stuff works.
Thanks for the tutorial.
Post a Comment